Cn/WxHaskell/Quick start
wxHaskell 快速入门
这个文档是一个为了让你能够编写 wxHaskell 应用程序的快速入门。更多的文档请参见wxHaskell 文档页.
Note from the author: I have written this page to be in close correspondence with the yahu getting started page – first of all to make my job easier by reusing Koen Claessen's excellent example, but also since it makes an interesting comparison: we reuse many concepts of yahu, most notably properties and attributes, but as yahu is based on Tcl/TK, the applications are also typed and structured in a fundamentally different way.
Daan Leijen
Hello world
打开你喜爱的编辑器,输入下面的代码。运行这段代码可以显示一个窗口,上面只有一个按钮,按下这个按钮可以关闭窗口。
module Main where
import Graphics.UI.WX

main :: IO ()
main
  = start hello

hello :: IO ()
hello
  = do f    <- frame    [text := "Hello!"]
       quit <- button f [text := "Quit", on command := close f]
       set f [layout := widget quit]
下面进入 GHCi 然后运行程序:
> ghci -package wx Hello.hs
[snip]
Loading package wx ... linking ... done.
Compiling Main ( Hello.hs, interpreted )
Ok, modules loaded: Main.
*Main> main
Note: On MacOS X, you can only use the interpreter with special scripts, as you need to build MacOS X applications. Normally, the following commands will do the job:
> ghc -package wx -o hello Hello.hs
> /usr/local/wxhaskell/bin/macosx-app -v hello
> ./hello
阅读 MacOS X 备忘 以了解更多的有关在 MacOS X 上运行 wxHaskell 的信息。
类型
一个典型的 wxHaskell 程序需要 import Graphics.UI.WX 库。如果你需要访问底层的wxWidgets 功能,你应该 import 更底层的 Graphics.UI.WXCore 库。main 函数用 start 函数来启动 GUI。函数 start 负责用指定的参数初始化 GUI 框架,然后启动窗口事件循环,直到应用程序退出,或者顶级窗口关闭为止。GUI 自身由以下的函数来描述:
frame  ::             [Prop (Frame ())] -> IO (Frame ())
button :: Window a -> [Prop (Button ())] -> IO (Button ())

text   :: Attr (Window a) String
layout :: Attr (Frame a)  Layout

(:=)   :: Attr w a -> a -> Prop w
set    :: w -> [Prop w] -> IO ()

command:: Event (Control a) (IO ())
on     :: Event w a -> Attr w a

widget :: Window a -> Layout
实际上,上面有些函数拥有更普遍的类型,你可以在 GHCi 中用 :t 命令来查看它们的类型。
类型 Frame () 和 Button () 表示图形对象。这些对象拥有一些properties。创建对象时我们可以提供一些 property,创建之后也可以用 set 函数来修改 property。框架的 property 是 Prop (Frame ()) 类型的,按钮的 property 是Prop (Button ()) 类型的。
Properties 是通过组合 attributes 和值得到的。上面的例子当中提到了两种 attributes,它们分别是 text 和 layout。attribute 的类型 Attr w a 应用在类型 w 和值 a 上。值可以通过 (:=) 运算符绑定给 attribute。你可以在 WX.Attributes 模块和 WX.Classes 模块的 haddock 文档上了解更多信息。
稍微有点特殊的 attribute 是 事件(events)。事件的类型是 Event w a,并且可以使用 on 函数转换成 attribute Attr w a。事件的值通常是一个 IO 动作,它会在事件发生时执行。查看 WX.Events 模块和更底层的 WXCore.Events 模块的 haddock 文档,可以了解更多有关事件的知识。
因为 wxHaskell 是一个面向对象的框架,因此我们也实现了继承。图形对象的类型有一个额外的参数用来标明类的继承关系。当类型的参数是一个 unit () 时,表示这是一个具体的类型;当类型的参数是一个类型变量 a 时,表示这是一个类型类,用这个类型类的任意一个实例填实就可以了。举例来说,函数 frame 和函数 button 都返回一个具体的类型(框架或者按钮),类型参数是 ()。作为对比,text 这个 attribute 它需要的只是任意种类的一个窗口,不管是框架还是按钮都行,所以它用 Window a 作为它的类型参数。前面我们就演示了如何在框架和按钮上使用 text 这个 attribute。在 wxHaskell 中,这样之所以能够工作,是因为类型 Frame () 实际上是类型 Window (CFrame ()) 的同义词,因此可以当需要 Window a 时给出一个 Frame ()。同样,类型 Button () 只是类型 Control (CButton ()) 的同义词,而后者又是类型 Window (CControl (CButton ())) 的同义词。
布局
窗口的布局通过 layout 这个 attribute 来指明。前面例子中的布局略显得有些简陋,接下来我们可以让它变得更有趣一些,比如把按钮居中,即使是窗口缩放时也居中。同时我们也可以给按钮周围添加一圈空白。
set f [layout := margin 10 (floatCentre (widget quit))]
我们也可以在按钮上方添加一个文本标签,同样使之居中。函数 column 的参数描述了标签和按钮之间的空白数量。
set f [layout := margin 10 (column 5 [floatCentre (label "Hello")
                                     ,floatCentre (widget quit)
                                     ] )]
你可以查看模块 WXCore.Layout 的文档以了解更多有关布局的知识。
弹力球游戏
现在是时候做一个更好玩的程序了。我们将写一个程序,它可以让我们在屏幕上玩弹力球!
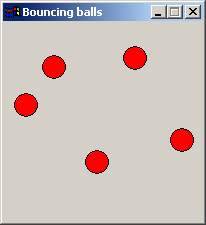
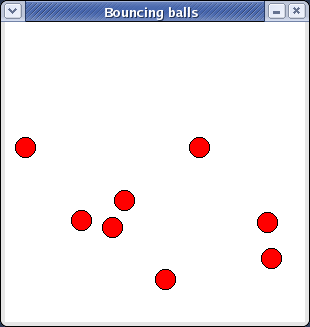
注意这个弹力球游戏的窗口不能缩放,因此最大化按钮是灰的。首先我们来看程序的主函数 – 《tt>ballsFrame:
module Main where
import Graphics.UI.WX

-- 常量定义,球的半径和窗口的长宽。
radius, maxX, maxY :: Int
maxY = 300
maxX = 300
radius = 10

-- 球的最大高度,实际上是 maxH 减去球的半径。
maxH :: Int
maxH = maxY - radius

-- 主函数
main = start ballsFrame

ballsFrame
  = do -- 球的列表,每个球由球将来的运动轨迹上的点来描述。
       vballs <- varCreate []

       -- 创建一个用户不能缩放大小的顶级窗口框架
       f <- frameFixed [text := "Bouncing balls"]

       -- 创建用来画图的面板
       p <- panel f [on paint := paintBalls vballs]

       -- 创建一个定时器,用来更新球的位置
       t <- timer f [interval := 20, on command := nextBalls vballs p]

       -- 和用户的交互
       set p [on click         := dropBall vballs p              -- drop ball
             ,on clickRight    := (\pt -> ballsFrame)            -- new window
             ,on (charKey 'p') := set t [enabled   :~ not]        -- pause
             ,on (charKey '-') := set t [interval :~ \i -> i*2]  -- increase interval
             ,on (charKey '+') := set t [interval :~ \i -> max 1 (i `div` 2)]
             ]

       -- 把面板放到框架中去,并且最小化。
       set f [layout := minsize (sz maxX maxY) $ widget p]
   where
     ...
和大多数函数式 GUI 库不同,wxHaskell 不提供状态管理的机制,用户不能用简单的变量来在多个不同的事件之间传递或保持状态。(Note: this is a concious design decision – as functional GUI interfaces are still very much a research area, we want to provide a full fledged GUI library using simple IO first, than try to build good functional interfaces on top of that). The state of the bouncing balls demo is a list of balls. Each ball is represented as a list of all its future heights. At the start of the program the list is empty (varCreate []).
Next, we use fixedFrame to create a non-resizeable window frame. A panel is created to paint the balls on and its paint handler paints the current balls in the panel. (Note: a panel has nothing to do with a Java panel: it is a widget that is normally used to place controls in as it manages control navigation keys like tab).
To animate the balls, we install a timer that advances all the balls on each timer tick and causes the panel to repaint the balls. We also install event handlers that react on the user: a mouse click causes a new ball to drop, a right click opens another frame (!), a p-key pauses the balls, and +/- increase/decrease the speed of the balls. Note how the operator (:~) applies a function to an attribute value instead of assigning one. Thus, the expression (set t [enabled :~ not]) flips the enabled state of the timer.
Finally, we specify the layout of the frame, using minsize to specifiy the minimal size of the panel and thus the size of the frame as it is not resizeable.
Painting
Let us look at the paint event handler of the panel:
    -- paint the balls
    paintBalls :: Var [[Point]] -> DC a -> Rect -> IO ()
    paintBalls vballs dc viewArea
      = do balls <- varGet vballs
           set dc [brushColor := red, brushKind := BrushSolid]
           mapM_ (drawBall dc) [p | (p:ps) <- balls]

    drawBall dc pt
      = circle dc pt radius []
A paint event handler gets two arguments: a device context (DC) to draw on and a rectangle that specifies the coordinates of the viewing area. We have supplied the first argument ourselves when setting the event handler, namely the mutable variable that holds the list of all balls.
As said, a single ball is represented as a list of all its future positions. When painting the current balls, we simple extract the head positions of all balls and draw them using drawBall. Drawing combinators like circle draw using the current pen, brush, and font of the device context. By default, a brush is transparent so we set it to a solid red brush before drawing the circles. Note that this is an optimization, we could have achieved the same effect by setting it for each circle individually: circle dc pt radius [brushKind := BrushSolid, brushColor := red]. You can read more about drawing in the documentation of the WX.Draw module.
Bouncing
The timer event handler uses nextBalls to advance all the balls to their next postion.
    -- advance all the balls to their next position
    nextBalls :: Var [[Point]] -> Panel () -> IO ()
    nextBalls vballs p
      = do varUpdate vballs (filter (not.null) . map (drop 1))
           repaint p
Updating the positions simply consists of dropping all initial positions and filtering out all empty lists. The function repaint is used to invoke the paint event handler of the panel.
When a users clicks on the panel, a new ball is created in dropBall.
    -- drop a new ball, gets mouse position as last argument
    dropBall :: Var [[Point]] -> Panel () -> Point -> IO ()
    dropBall vballs p pt
      = do varUpdate vballs (bouncing pt:)
           repaint p

    -- calculate all future positions
    bouncing (Point x y)
      = map (\h -> Point x (maxH-h)) (bounce (maxH-y) 0)

    -- calculate all future heights
    bounce h v
      | h <= 0 && v == 0 = replicate 20 0 -- keep still for 20 frames
      | h <= 0 && v  < 0 = bounce 0 ((-v)-2)
      | otherwise        = h : bounce (h+v) (v-1)
We prepend a new list of ball positions to the existing list using the varUpdate function and we repaint the panel. The new list of positions is calculated with the bouncing function that takes the position of the mouse pointer as its argument. This function uses the bounce function to calculate all future heights given an initial height and speed. Each time the ball touches the ground, it loses 2 units of speed.
Hopefully this sample inspires you to write more interesting GUI's. Don't forget to look at the samples provided with the wxHaskell documentation.


